SOCIAL MEDIA

Tuesday, February 2, 2021

Keto Creamy Asparagus Soup


Since the hubby has gone back to Keto for the New Year, I have been going down the rabbit hole (again) on soups and entrees we both can eat and enjoy that are super low carb and incorporate lots of veggies, flavor, and are versatile. With both of us working from home still (I work 4 hours at the office and 5 - 6 more at home), it is also beneficial for me to have healthy lunch options on hand for when I get back from the office and am SUPER hungry and need to get back on the computer stat. If you can pack them full of macro and micronutrients, even better. Asparagus is high in folic acid and a good source of potassium, fiber, thiamin, and vitamins A, B6, and C. Combine that with the iron, zinc, protein, and calcium of the other ingredients and you have a well balanced side dish.

With it being the weekend, I needed to get those last batches of fresh veggies from the Italian Market out of the fridge and cooked so I can do my weekly stock tomorrow. I had some extra asparagus (two batches) on hand and started googling ingredients for a decent asparagus soup. Lucky, I had lots on hand to work with and didn't need to head to the supermarket for anything else. I also got to use my new immersion blender I got for Christmas!


RECIPE:


What you need: A large pot or Dutch oven and an immersion blender or other blender.

Ingredients
:

  • 2 bunches of asparagus (bottom stems removed and chopped into 1 - 2" pieces)
  • 4 cups (one regular size box) of chicken broth
  • 2 tbsp butter
  • 2 tbsp minced garlic
  • 1 yellow onion (diced)
  • 1/2 cup heavy cream
  • 1/2 cup shredded parmesan


  • Directions:
    • Place butter, garlic, and chopped onions into your pot. Sauté for a few minutes until the onion becomes translucent.
    • Add your chopped asparagus to the mixture and sauté for a few minutes.
    • Add the chicken broth and bring to a boil. Lower the heat and simmer for a few minutes or until the asparagus is nice and tender.
    • Remove your soup from heat. Carefully place the soup in a blender or use an immersion blender in the pot, and puree until creamy and even.


    • Place soup back in your pot and add the heavy cream. Cook on medium heat until hot but do not bring to a full boil.
    • Remove from the heat and stir in the grated parmesan.
    • Serve immediately, or store in the fridge for up to 5 days. 

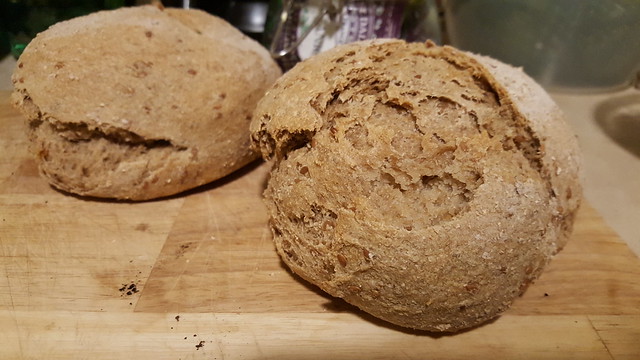
    This soup is great on its own, with some warm bread (if you eat it), or with some sausages. 

    Wednesday, April 15, 2020

    Playing With Worms


    Over several years I had tried off and on to master the art of composting in our small yard. And of those tries, 100% of them have failed. Either the soil would remain too wet, there wasn't enough drainage, or it would just smell horribly ALL THE TIME. But, for some strange reason, I picked this lockdown time to again try to compost....this time with WORMS!

    With April being Earth Month, learning to compost is a fun and educational activity to do with your kids. Composting is incredibly beneficial for those who garden, even casually, and vermicomposting - composting with worms - helps to enrich the soil and reduce/ eliminate the need for chemical fertilizers. Other benefits of composting include:

    • Naturally eliminating food waste
    • Reduces greenhouse gases
    • Improves soil quality
    • Helps clean up contaminated soil
    • Helps control erosion
    • Saves money
    • And it is good for the environment! 
    In addition to all of the environmental benefits, having a worm farm to take care of is just fun! Just like any pet, you have to take care of them and enjoy the benefits of watching them grow and even reproduce. 

    When setting up my vermicompost bin I did what almost everyone does to learn anything new: turn to YouTube. I had tried the 5 gallon bucket method before for regular composting, but that yielded no results. I decided to try the same method again, just using some little helpers this time. 

    Following the methods prescribed in THIS VIDEO (which I will also embed below), I used two hardware store buckets (as opposed to totes) with only one lid. Drilling holes in the bottom, sides, and top helps to ensure drainage and adequate oxygen for your worms (they are living after all). It also releases the gases produced by the composting. Remember, do this in only ONE of the two bins.

    Drilling the Bins

    After drilling your holes, place the drilled bin into the second. This bin will trap the liquids from the first. You can use this "tea" to boost the microbiological activity in your soil by dumping it directly into your plants or veggie plants (think plant kombucha) or you can scoop some of the casting later and literally brew it like you would a cup of tea.

    Getting the worms into their new homes

    I ended up ordering my worms from Amazon because of the difficulty some sellers were having with shipping, but Uncle Jim's Worm Farm us always a good place to shop. For around $20 I bought 200 red wriggler worms. When they arrived 90% of them were alive and HUNGRY! We quickly added them to some soil and bedding and put some kitchen scraps in for them to eat.  Given that it was below freezing for the first few nights, we chose to bring them indoors at night to keep them safe.


    Adding some food and top bedding

    We are around two weeks into our composting and although a handful of the worms are either hiding or have passed on, those in there are showing signs of growth and some of the materials are showing signs of compost. The bedding, we are noticing, is one of the most important aspects to a healthy bin as well as the moisture.

    Worms Two Weeks Later

    To learn how to make your own vermicompost bin I recommend watching the video below:
    as it seem

    We have been enjoying checking on our new friends during the week. As minuscule as it seems, it is still nice to know that you are making a difference - and learning a lot of new stuff too! :) 

    Tuesday, April 14, 2020

    Making Moon Sand


    After a bit of a rough go in the morning yesterday with homeschooling, I made a decision to turn the day's science lesson into a sensory/science project. Sensory activities are a fun way to help your kids learn using hands on play and to help them therapeutically, which is something I am sure a lot of kids right now could really use as they are surely experiencing overwhelming changes and increased stressors in their life (as we all are).

    One of the things we have liked using through the years are small sand bins with toys and I always like to keep those mini archaeological dig sets around for times like this, but I wanted to actually make something. To go along with that "sandy" theme we decided to make moon sand.

    Moon sand is easy to make and only uses two ingredients: flour and baby oil. The consistency is thicker than regular play sand (think more like  semi-wet sand on the beach or a packed cup of brown sugar in consistency) but not "puffy" like kinetic sand. It can last a long time if kept in a sealed container and you can also add gel food coloring to the mixture as well.


    Here is what you need:

    Supplies

      • 4 cups all-purpose flour 
      • 1/2 cup baby oil 
      • mixer/mixing bowl
      • dough hook*

                 * the dough hook is not necessary, but definitely made the task a lot easier

    Combine your ingredients in your bowl and mix for a few minutes on low, breaking up any clumps that form. To make more, simply double your ingredients. Store in a Ziplock bag or air tight container after use to keep it from drying out. 


    It was a rainy day, so we played with out sands inside...which I quickly regretted as it is a bit messy and embeds itself into the carpeting and furniture. Let's just say I had to run the rug cleaner after. But, it kept him calm for almost two hours and we still have some left to play with later today. 

    What are some of your favorite sensory activities? 

    Thursday, April 2, 2020

    Our Desert Fort


    As we are entering week 3 of the "stay at home" order as well as week 3 being out of school, lessons and routines have changed drastically and the chaos is most likely wearing on us all. With the times being crazy and the predicament out of our hands, this entire situation is leaving not only parents but kids as well in need of someplace to get away. When we were kids and we wanted to hide away from the grown up and make our own little world, what did we do? Build a fort

    One of the benefits of having to homeschool recently has been the incorporation of fun little projects into our learning experience. This week our reading assignment was to read "A Walk in the Desert" by Caroline Arnold, a expository story about the desert and the animals that live in it. As part of the project, the class was challenged to build a reading fort inspired by the story. Fortunately, I always keep craft supplies stashed away and being a camping family we had lots of other stuff on hand to make it extra special.


    We learned all about different types of cacti, the hot, arid desert climate, and some wonderful animals that live in the habitat.


    Eamon's favorite parts of the story were learning about all of the different cactus species, the owls, and especially the coyotes.

    A few years back we purchased the IKEA bunk beds for Eamon's room. Honestly, it was one of the greatest purchases we made for that room.  We made the bottom part into a little reading nook with and arm pillow, cork board for photos, and a box for his dress up clothes, so it was easily converted for the project.

    With an old grey sheet, I covered the inside of the nook, and took some old glow in the dark stars and added dozens more yellow construction paper ones we cut out. We also have a moon that actually changes phases with a remote that we moved into the fort.


    Some construction paper cacti, lanterns, a wind up radio, and sleeping bag from the camping bin make the atmosphere more dynamic.


    A construction paper fire (with fresh cut firewood) with a flashlight taped behind and some desert critter stuffed animals complete the set up.


    The kids all conducted part of their online class in their forts, which was adorable. They all had so much fun constructing them and sharing them with their friends. Eamon loves being in his so much more now that it is decorated. He even laid down in it last night watching a show on his tablet and playing with his toys. To make it more "permanent" we even got him his very own snake plant to take care of and stuck it in the fort. 🍃

    I can't wait to see what kind of challenge we get to do next week. In the mean time, I challenge you to set aside a place in your home, maybe even a little nook in their room if need be, and turn help your kids turn it into their own fort. Set aside a few minutes of the day where they can get a break from their school work and be alone to think and to imagine play. Even in a world full of gadgets and tech you'd be surprised what they can come up with. :)

    Friday, March 27, 2020

    Grow Your Own Scrap Garden

    We have been doing a lot of planting this week. Between homeschooling science lessons and, well, spring arriving, it was the perfect time to put some seeds in the ground and begin a new life cycle.


    Getting ready to transplant my scallions. 

    Yesterday, while I was adding to and transplanting my endless supply of scallions on my counter, I was reminded of a video a friend shared on my Facebook wall on what is commonly known as "cut and come again" gardening.

    A cut and come again garden, or scrap garden, is exactly what it sounds like. A variety of plants, including most leafy green plants,  celery, onion varieties, beets, and even potatoes, continue to grow and reproduce from the pieces we would normally discard, producing a new and endless supply without having to continuously replant seeds.  For instance, have you even had an onion sprout a green stem or some potatoes grow "eyes?" Well, you can plant these pieces into the ground and re-grow the same vegetable.

    Some other varieties of "cut and come again" vegetables include: amaranth, basil, beetroot, chicory, coriander, chard, corn salad, dandelion, endive, celery, lettuce, mustard, pak choi, parsley,  radicchio, red kale, and spinach. Many can remain potted indoors to grow during the winter and will easily transplant outdoors. Or, like my scallions, you can keep them on your kitchen counter within reach.

    As you can see in the photo, the roots will extend when planted. Some veggies will root better when first soaked in water and then replanted into the soil. 

    Creating your own "cut and come again" garden  is a great way to introduce gardening to your children while having fun. It reduces food scraps and will save you money on groceries in the long run...It may also convince your kids to eat their veggies as well. 😉

    Preparing some onions and garlic to plant. 

    You don't need a lot of room to grow your scrap garden All you need is a small container and a sunny spot. Some vegetables will begin to regrow almost immediately, where as others, like bulb veggies (think garlic and onions) will take some time, but they are definitely worth the wait. It is so fulfilling to have the veggies you need on hand and even more so knowing that you are growing them yourself.


    To learn more you can check out the video below.


    Wednesday, March 25, 2020

    Healthy & Homemade Banana Bread

    Today was one of those days where I could say that I wasn't actually "ok"during this shutdown. I woke up with my head in a fog and achy ("side effects" from the fibro) and antsy to get out and do something. I have been out of the house on twice during the past two weeks and it was taking a toll on me.

    I took a quick early drive to try to find some vegetable plants to sow, and when that went south, I turned around and hit up a local bakery for some fresh bagels. There really isn't much that fresh baked items cannot solve, so when I couldn't shake the icks, I tied my apron on and had to do some baking myself.


    If your house is anything like mine, there are always a few bananas that need to hurry up and get used. There are only so many that I can eat in a week and my kid is gung-ho on Monday to eat them and by Wednesday is no-so-enthused by their prospect. And being that there are no gyms open right now, I needed a recipe that was not chocked full of the calories of the sugar-loaded breads. So, I played around with some methods and made something more "banana" and less "bread."

    Here is what you need:


    • 3 - 4 ripe bananas
    • 1 large egg
    • 1 tablespoon vanilla extract
    • 3 tablespoons of brown sugar
    • 2 tablespoons of granulated sugar
    • 1 teaspoon ground cinnamon
    • 1/8 teaspoon of cloves
    • 1 teaspoon baking powder
    • 1 teaspoon of baking soda
    • 1/2 teaspoon salt
    • 1 1/2 cups of flour (any kind except self rising)
    • 2 tablespoons of melted butter
    • nuts of your choice (optional)
    .....glass of wine while baking is optional 😉


    Directions:

    Preheat your over to 350.

    Mash you bananas in a large bowl. Add egg, sugars, vanilla, and spices and combine well. In a separate bowl, mix your flour, baking soda, and powder. Slowly add to your wet mixture. When combined, add in your melted butter and mix again. If you are adding nuts or seeds, do so as well. 

    Grease a 9x5 bread pan or line with parchment paper. Add your mixture and bake for approximately 35 - 45 minutes. (I topped mine with a sprinkle more of cinnamon before baking.)

    Remove from pan and let cool. Enjoy with coffee, tea, or just sneek a piece just because! 


    Monday, March 23, 2020

    Whole Wheat Flax Bread Recipe

    If you have been to any store within the past week or two you most likely have noticed that the shelves are pretty much bare of milk, eggs, bread, and even plain white flour. People are panicking and stocking up on things to sustain themselves in case they cannot get out for their basic necessities.

    I'm pretty sure that Pinterest is in overload right now with people searching for recipes at this very moment, but I wanted to share an old recipe of one of the healthiest breads I have ever made. You only need a few ingredients to make it, and, even at this time, I'm sure that they are sitting on the shelves of your corner store or local market.


    wheat&flaxbreadrecipe

    This post was originally published on my old blog "Life With the Pea" in 2017. 

    Even though I am going gluten free for Lent, I needed to share this recipe for my Tutorial Tuesday..I mean THURSDAY! I had wanted to make my own whole wheat bread last week to eat with the following day's dinner, but I am not a fan of having to sit and wait...and wait...and wait for my breads to rise. I also wanted to make some whole wheat bread since I had a large opened bag that I needed to start using up and we had been eating so much of the white stuff the past week. I went online and found the 5 Minute Flax Wheat Bread Recipe from momdish.com and decided to give it a try.


    At first I didn't realize that you needed to let it rise overnight and began whisking away to gather ingredients just before dinner, but in the end I was glad I could mix up the ingredients and not have to do anything else until the next day. Busy, busy me!

    wheatflaxbread

    The ingredients are super simple:
        3 cups Whole Wheat Flour
        2 teaspoons Yeast
        1 teaspoon Salt
        1 cup Ground Flax Seed
        1 1/2 cups Luke Warm Water

    The recipe itself is just as simple:

      Mix dry ingredients. Mix in water a little at a time. Fold it all in with your hands and place in a bowl covered with plastic wrap overnight. 
      The next day your bread should be bubbly and sticky. At this point you can either split into two loaves or leave as one. We decided to split the loaves, which was a good idea since it is very hearty and filling. Place your loaf (or loaves) on a floured baking sheet, cover with a dish towel, and let rise another hour before baking. Although the recipe doesn't specify that you must, we rolled ours out a little on a floured surface before hand (well, actually my hubby did it since I was still at the gym).
      Preheat the oven to 450F. Pour 2 cups of hot, boiled water into a deep cooking sheet. Place this cooking sheet on a lower level, inside your oven. (This will make the bread crispy and make it rise more). Place the bread on the top level on a separate baking sheet. Remove water from the oven after 10 minutes. Keep on baking bread for another 20-30 minutes (depending on the size of the bread).

    Like I said, the bread is super hearty. It actually tastes healthier, which makes you feel better about eating it, especially when you cover it in grass fed butter. There are also no preservatives like store bought breads (well most) and it tastes wonderful with homemade  blueberry jam. It is definitely a bread every homesteader (urban or otherwise), natural baking lover, and bread lover should keep in their repertoire.

    This post contains affiliate links. I was neither paid nor received any other compensation to endorse the products contained in this post. All opinions expressed herein are my own and all photos are my own with applicable copyrights retained.