We have been doing a lot of planting this week. Between homeschooling science lessons and, well, spring arriving, it was the perfect time to put some seeds in the ground and begin a new life cycle.
Getting ready to transplant my scallions.
Yesterday, while I was adding to and transplanting my endless supply of scallions on my counter, I was reminded of a video a friend shared on my Facebook wall on what is commonly known as "cut and come again" gardening.
A cut and come again garden, or scrap garden, is exactly what it sounds like. A variety of plants, including most leafy green plants, celery, onion varieties, beets, and even potatoes, continue to grow and reproduce from the pieces we would normally discard, producing a new and endless supply without having to continuously replant seeds. For instance, have you even had an onion sprout a green stem or some potatoes grow "eyes?" Well, you can plant these pieces into the ground and re-grow the same vegetable.
Some other varieties of "cut and come again" vegetables include: amaranth, basil, beetroot, chicory, coriander, chard, corn salad, dandelion, endive, celery, lettuce, mustard, pak choi, parsley, radicchio, red kale, and spinach. Many can remain potted indoors to grow during the winter and will easily transplant outdoors. Or, like my scallions, you can keep them on your kitchen counter within reach.
As you can see in the photo, the roots will extend when planted. Some veggies will root better when first soaked in water and then replanted into the soil.
Creating your own "cut and come again" garden is a great way to introduce gardening to your children while having fun. It reduces food scraps and will save you money on groceries in the long run...It may also convince your kids to eat their veggies as well. 😉
Preparing some onions and garlic to plant.
You don't need a lot of room to grow your scrap garden All you need is a small container and a sunny spot. Some vegetables will begin to regrow almost immediately, where as others, like bulb veggies (think garlic and onions) will take some time, but they are definitely worth the wait. It is so fulfilling to have the veggies you need on hand and even more so knowing that you are growing them yourself.
Today was one of those days where I could say that I wasn't actually "ok"during this shutdown. I woke up with my head in a fog and achy ("side effects" from the fibro) and antsy to get out and do something. I have been out of the house on twice during the past two weeks and it was taking a toll on me.
I took a quick early drive to try to find some vegetable plants to sow, and when that went south, I turned around and hit up a local bakery for some fresh bagels. There really isn't much that fresh baked items cannot solve, so when I couldn't shake the icks, I tied my apron on and had to do some baking myself.
If your house is anything like mine, there are always a few bananas that need to hurry up and get used. There are only so many that I can eat in a week and my kid is gung-ho on Monday to eat them and by Wednesday is no-so-enthused by their prospect. And being that there are no gyms open right now, I needed a recipe that was not chocked full of the calories of the sugar-loaded breads. So, I played around with some methods and made something more "banana" and less "bread."
Here is what you need:
3 - 4 ripe bananas
1 large egg
1 tablespoon vanilla extract
3 tablespoons of brown sugar
2 tablespoons of granulated sugar
1 teaspoon ground cinnamon
1/8 teaspoon of cloves
1 teaspoon baking powder
1 teaspoon of baking soda
1/2 teaspoon salt
1 1/2 cups of flour (any kind except self rising)
2 tablespoons of melted butter
nuts of your choice (optional)
.....glass of wine while baking is optional 😉
Directions:
Preheat your over to 350.
Mash you bananas in a large bowl. Add egg, sugars, vanilla, and spices and combine well. In a separate bowl, mix your flour, baking soda, and powder. Slowly add to your wet mixture. When combined, add in your melted butter and mix again. If you are adding nuts or seeds, do so as well.
Grease a 9x5 bread pan or line with parchment paper. Add your mixture and bake for approximately 35 - 45 minutes. (I topped mine with a sprinkle more of cinnamon before baking.)
Remove from pan and let cool. Enjoy with coffee, tea, or just sneek a piece just because!
If you have been to any store within the past week or two you most likely have noticed that the shelves are pretty much bare of milk, eggs, bread, and even plain white flour. People are panicking and stocking up on things to sustain themselves in case they cannot get out for their basic necessities.
I'm pretty sure that Pinterest is in overload right now with people searching for recipes at this very moment, but I wanted to share an old recipe of one of the healthiest breads I have ever made. You only need a few ingredients to make it, and, even at this time, I'm sure that they are sitting on the shelves of your corner store or local market.
This post was originally published on my old blog "Life With the Pea" in 2017.
Even though I am going gluten free for Lent, I needed to share this recipe for my Tutorial Tuesday..I mean THURSDAY! I had wanted to make my own whole wheat bread last week to eat with the following day's dinner, but I am not a fan of having to sit and wait...and wait...and wait for my breads to rise. I also wanted to make some whole wheat bread since I had a large opened bag that I needed to start using up and we had been eating so much of the white stuff the past week. I went online and found the 5 Minute Flax Wheat Bread Recipe from momdish.com and decided to give it a try.
At first I didn't realize that you needed to let it rise overnight and began whisking away to gather ingredients just before dinner, but in the end I was glad I could mix up the ingredients and not have to do anything else until the next day. Busy, busy me!
The ingredients are super simple:
3 cups
Whole Wheat Flour
2 teaspoons
Yeast
1 teaspoon
Salt
1 cup
Ground Flax Seed
1 1/2 cups
Luke Warm Water
The recipe itself is just as simple:
Mix dry ingredients. Mix in water a little at a time. Fold it all in with your hands and place in a bowl covered with plastic wrap overnight.
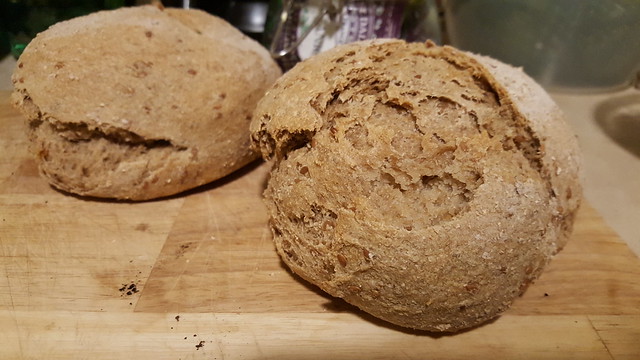
The next day your bread should be bubbly and sticky. At this point you can either split into two loaves or leave as one. We decided to split the loaves, which was a good idea since it is very hearty and filling. Place your loaf (or loaves) on a floured baking sheet, cover with a dish towel, and let rise another hour before baking. Although the recipe doesn't specify that you must, we rolled ours out a little on a floured surface before hand (well, actually my hubby did it since I was still at the gym).
Preheat the oven to 450F. Pour 2 cups of hot, boiled water into a deep cooking sheet. Place this cooking sheet on a lower level, inside your oven. (This will make the bread crispy and make it rise more). Place the bread on the top level on a separate baking sheet. Remove water from the oven after 10 minutes. Keep on baking bread for another 20-30 minutes (depending on the size of the bread).
Like I said, the bread is super hearty. It actually tastes healthier, which makes you feel better about eating it, especially when you cover it in grass fed butter. There are also no preservatives like store bought breads (well most) and it tastes wonderful with homemade blueberry jam. It is definitely a bread every homesteader (urban or otherwise), natural baking lover, and bread lover should keep in their repertoire.
This post contains affiliate links. I was neither paid nor received any other compensation to endorse the products contained in this post. All opinions expressed herein are my own and all photos are my own with applicable copyrights retained.
As we are sitting in the beginning of WEEK 2 of the self quarantine (and day 1 of the shelter in place order by the Governor) resulting from the widespread COVID-19 virus, I know a lot of parents are struggling to maintain some sense of normalcy while not only working from home but also playing wife, mother, AND teacher(among other roles) to our children.
This morning I tried to sign into my old blog account to grab some of the ideas I had previously posted to only find that my original blog domain expired and the content that went along with it completely lost. I was able to set up this new domain, and, fortunately I was somewhat fastidious at the time with backing up my posts and was able to find this gem of a stay-at-home-activity.
You see, my son LOVES dinosaurs and has for quite some time now. When this post was originally published just about 2 years ago he was at his peak of dino interest -- we had to go to the museum ev-er-ry weekend and I could barely get Dino Dan or Dino Dana off of the television! This activity is super easy and uses materials you most likely have around the home. It is also a great way to teach kids about dinosaur while integrating sensory play.
This past weekend, Eamon and I conducted a little experiment in the kitchen. It's really difficult to get him interested in crafts at times; he'd much rather build train tracks and run cars around the house, but the need for his involvement in sensory based activities is becoming more important lately.
The past summer, thanks to dozens of visits to the Academy of Natural Sciences, created a new love for Eamon - dinosaurs! And thanks to a great video from What's Up Moms (probably my favorite mom vlog right now on YouTube, I discovered a fantastic recipe for dinosaur eggs.
Using household ingredients and a stash of tiny dinosaurs, we made our very own activity for the budding paleontologist.
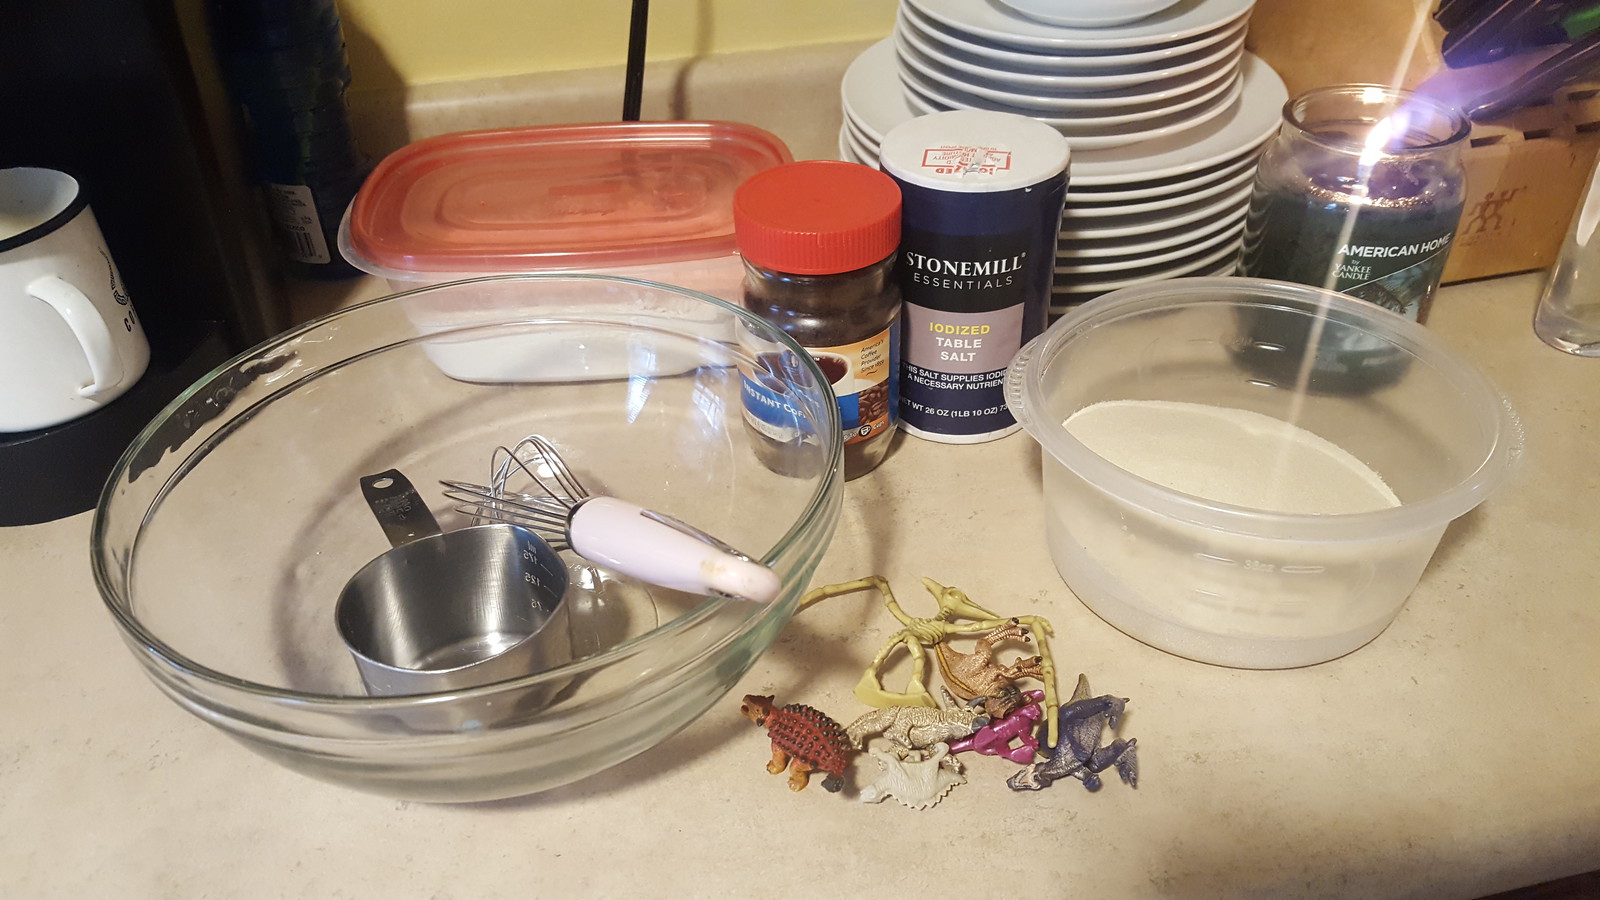
Ingredients:
To make the dinosaur eggs all you need is salt, flour, ground coffee, and play sand. We actually tried, originally, to use a container of instant coffee that no one would drink in the house (but we still kept around for camping) for the first batch of eggs but switched to regular ground coffee for the second. It only changed the consistency slightly believe it or not, but the smell of the coffee was a little overwhelming.
Directions:
Using one cup of each ingredient, mix in a large bowl until the ingredients are evenly mixed throughout. Add in 1/2 cup of water and stir until blended evenly.
When your mixture is the right moldable consistency, form into and egg shape, making sure to fit your "fossil" into the center. Once you have your eggs formed, place them on a baking sheet and bake for about an hour at 200 degrees. Eamon was so afraid that his dinosaurs were going to melt in the over, but the low temperature of the oven simply removes the excess moisture from the mixture - much like a dehydrator.
Once your eggs are done baking, let them cool off before letting your little one at them. This was the most difficult part of the experience and Eamon ended up mashing right into a few of them while they were still warm. He just couldn't wait.
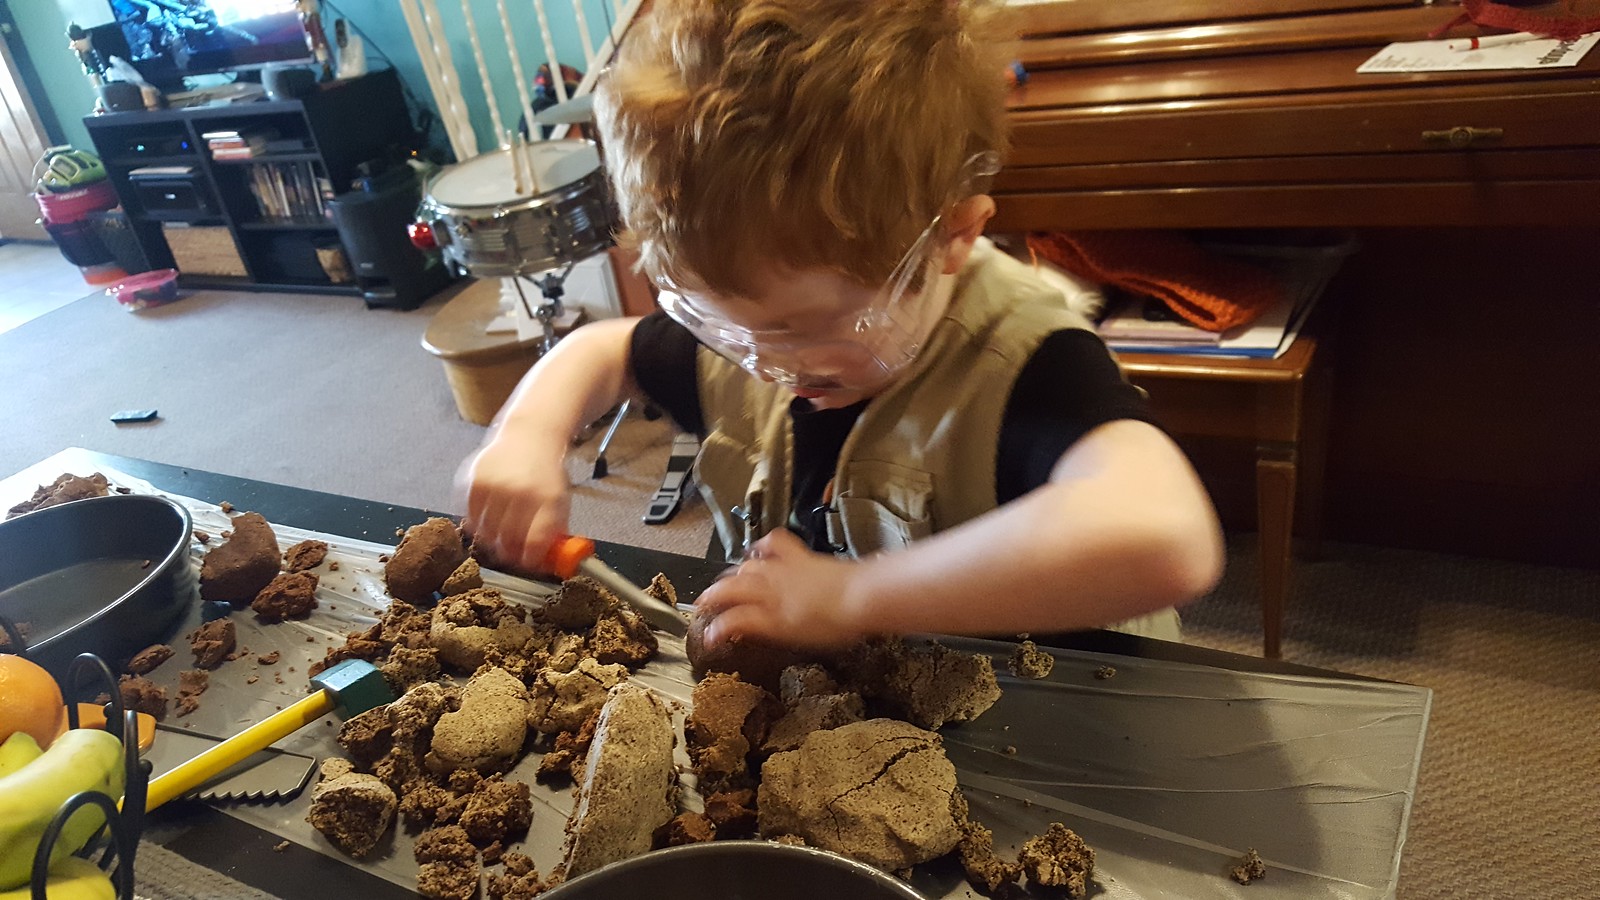
Let the fun begin (or end)!
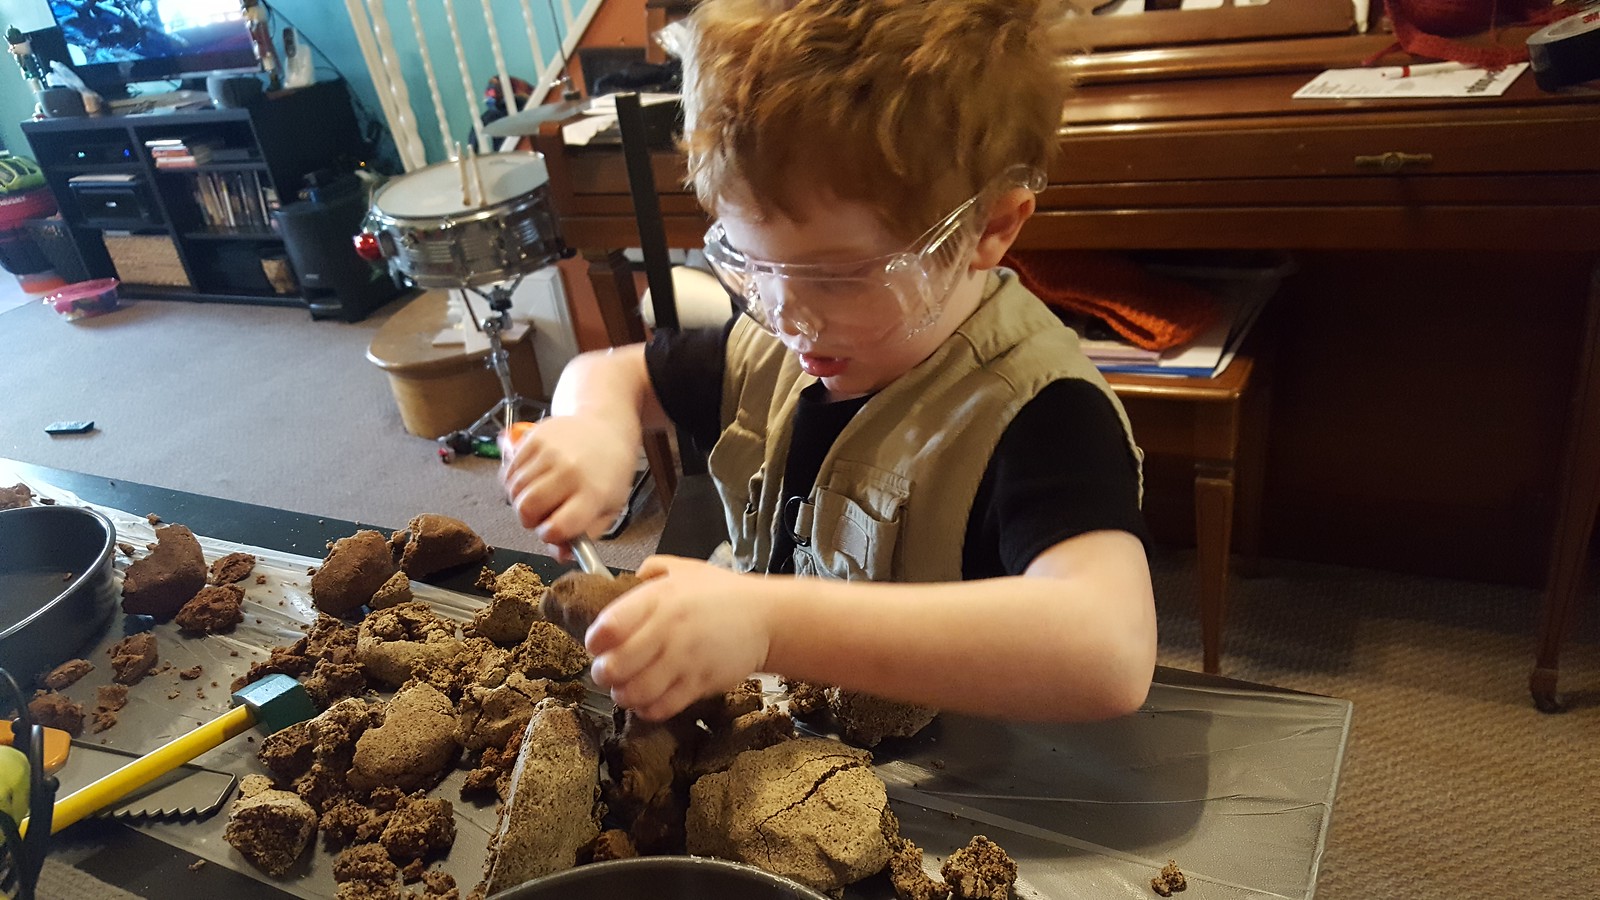
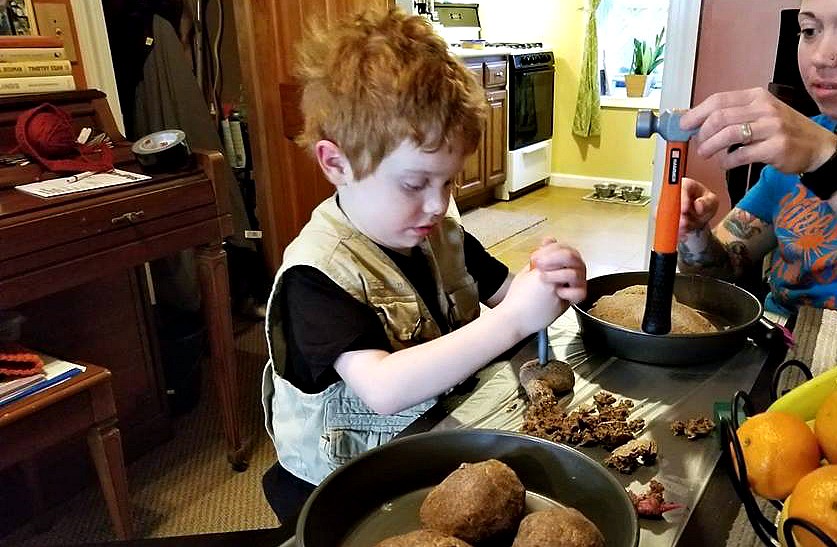
This was the best part! Using his little Home Depot tool kit, Eamon dug right into his eggs. Adding a little bit of extra water them made it softer and easier to unearth (get it?!)
It didn't take long for him to hammer, chisel, and saw away and find his dinos safe and sound deep in the center of the eggs. <3
Mixing and forming the eggs was very therapeutic and is a great sensory play in itself. Eamon loves dirt and sand and this really reminded him of playing at the beach digging through and compacting wet sand into shapes. Even when his eggs were already broken up he still wanted to spend nearly half an hour more just playing with the broken pieces, trying to crumble through, mold, and bury toys underneath letting his imagination run wild.
MOM TIP: I have to say that I'm glad I put down some Press and Seal on the table before he "dug into" this activity because any time you put little boys in front of anything hammering, digging, or breaking apart, you're bound to get some where it wasn't supposed to be, but this time I was able to 1 - 2 - 3 clean up just by removing the wrap from the table and balling it up into the trash when he was done. If you're more of a visual learner check out the link to the What's Up Moms vlog below, which is where I got this awesome idea!